
Help Guarantee an Efficient and Stress-Free Project: 6 Stages of Home Construction to Know Now!

Have you always dreamed of building your own home, but the thought of actually following through strikes fear in your heart because it’s completely out of your comfort zone? I get it. Residential construction is a complex process that involves meticulous planning and precise execution. From the initial concept to the final finishing touches, hundreds of decisions are involved in bringing a residential project to life.
Scary? Maybe. Impossible? Not at all. This month’s post is written to explain the key stages in residential construction, providing you with a comprehensive overview of the steps. Hopefully you will come away with helpful insights, and feel informed and comfortable enough to finally start your own project!
Stage 1: Pre-Construction
The pre-construction stage sets the foundation for a successful residential construction project. It involves several crucial steps that often happen concurently, including:
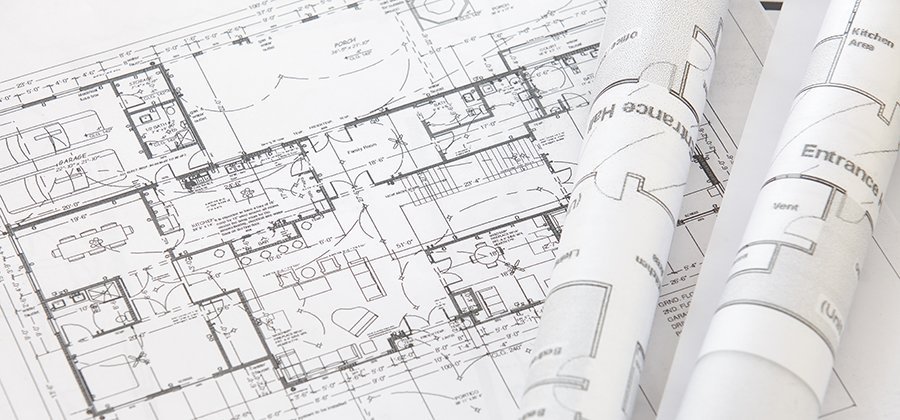
A) Planning and Design: Architects and Interior Designers work closely with clients to create a blueprint for the project. This phase can take anywhere from 3 months to over a year, depending on the size and complexity. Factors from layout and materials to budget and functionality are carefully considered to ensure the desired outcome.
B) Site Selection and Preparation: Choosing an appropriate site is crucial. Factors such as accessibility, zoning regulations, and environmental impact all need to be assessed. Additionally, the site may need to be extensively prepared, which involves clearing, grading, and ensuring proper drainage. A site engineer and/or surveyor may need to be employed if the site is particularly complicated.
C) Permits and Approvals: Obtaining the necessary permits and approvals from local authorities is an essential step to ensure compliance with building codes and regulations. Your builder should be well-versed in the particular requirements of the location of your site, and should help you and your Designer navigate the paperwork so that things progress smoothly.
Stage 2: Foundation
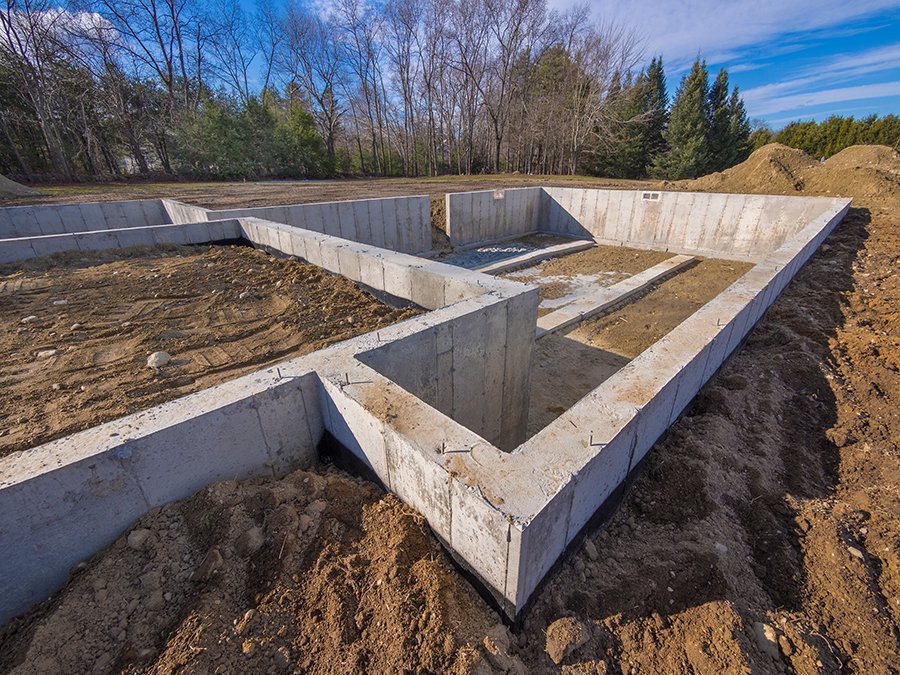
The foundation stage is where the physical construction process begins. The key steps involved in this stage are:
A) Excavation: Excavation involves digging trenches to create space for the foundation. The soil is removed, and any required leveling is done.
B) Footings and Foundation Walls: Footings are laid to distribute the weight of the structure evenly. Foundation walls are then constructed, typically using concrete or masonry, to provide structural support.
C) Waterproofing and Drainage: To protect the foundation from moisture, waterproofing materials are applied. Drainage systems such as sump pumps, are installed to prevent water accumulation. The type of system you select will depend not only on cost but also your location and the type of climate found there.
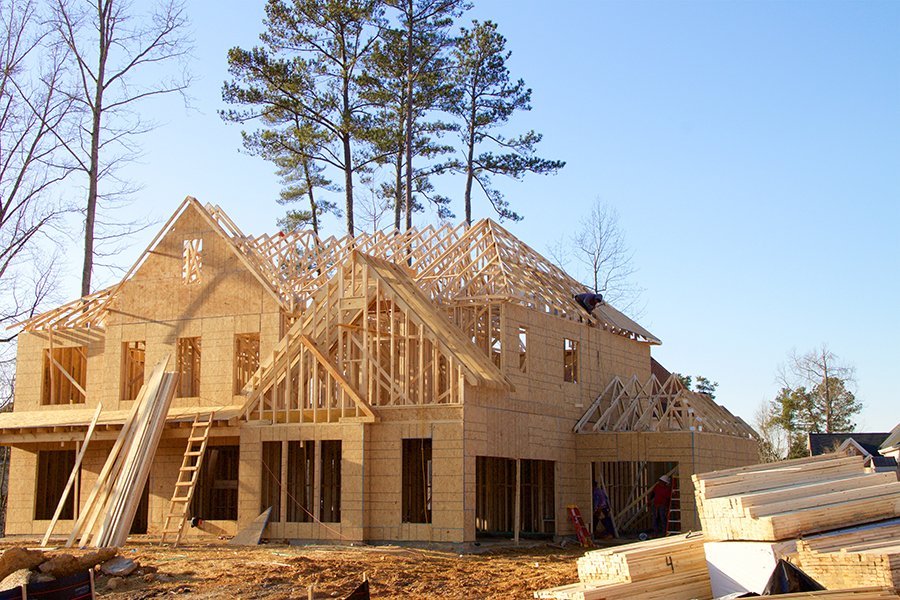
Stage 3: Framing
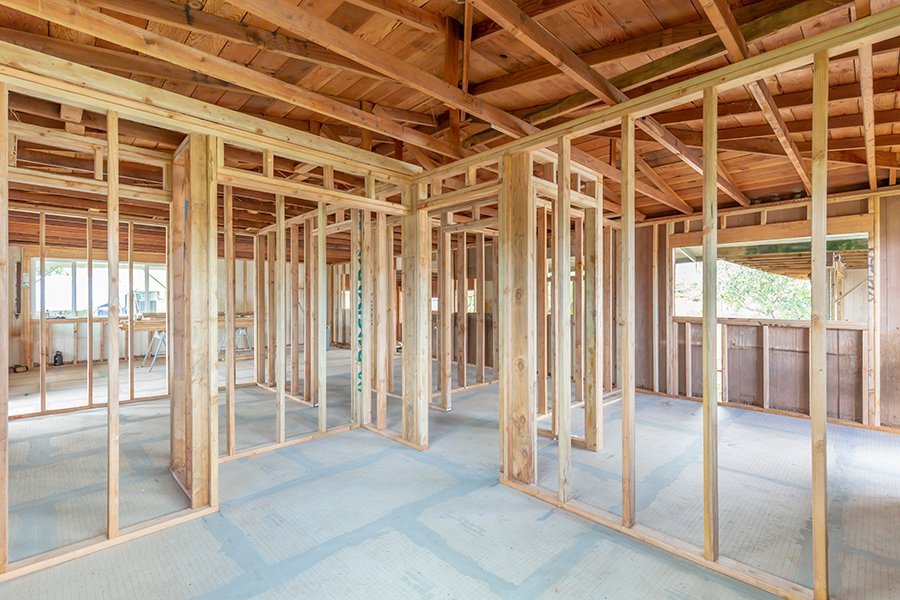
The framing stage is where the basic structure of the residential building takes shape. This stage involves the following steps:
A) Floor, Wall, and Roof Framing: The framework of the building is constructed using wooden or steel beams, columns, and studs. This provides the structural support for the walls, floors, and roof.
B) Installation of Windows and Doors: Openings for windows and doors are framed fairly early on. Typically the actual windows and doors are installed at a later date in the construction process.
Stage 4: Mechanical and Electrical Installation
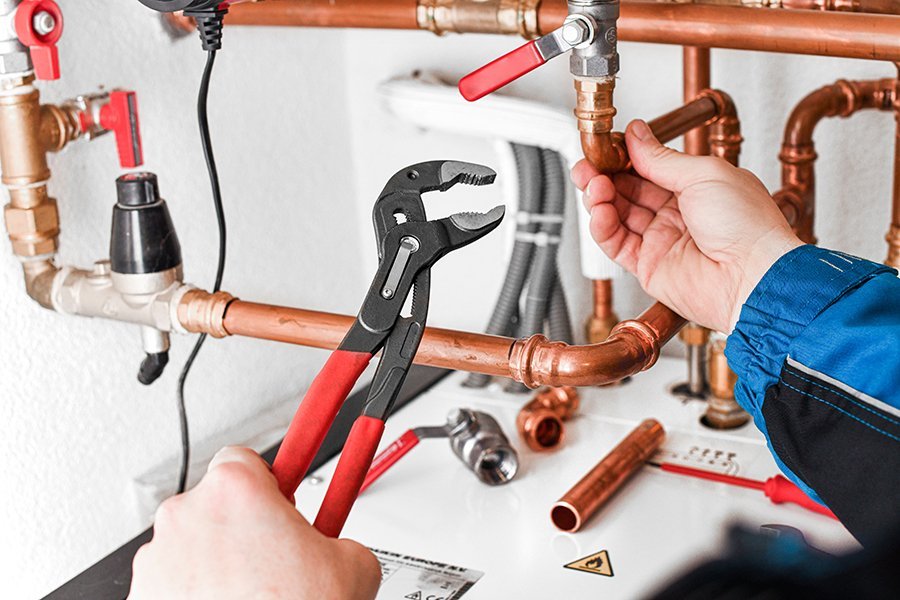
During this stage, the necessary mechanical and electrical systems are installed. Key steps include:
A) Plumbing: Plumbing lines, including water supply and drainage pipes, along with fixtures such as sinks, toilets, and showers are put into place.
B) Electrical: Wiring, electrical panels, outlets, and switches are installed. Lighting fixtures and other electrical components are also incorporated, but decorative features are installed later on in the process.
C) HVAC Systems: Heating, ventilation, and air conditioning systems are installed to regulate temperature and maintain indoor air quality.
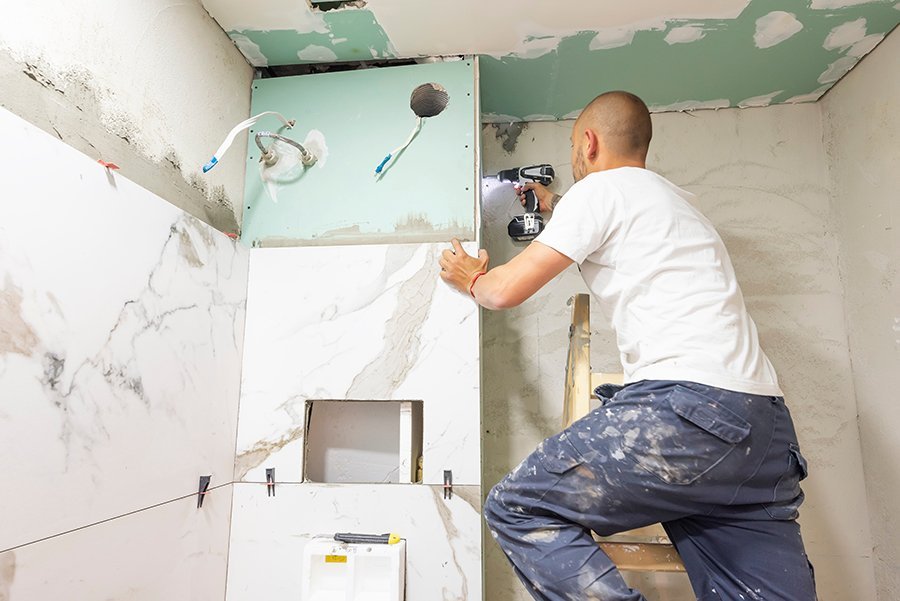
Stage 5: Interior and Exterior Finishing
This stage involves giving the residential property its final appearance and functionality. Key steps include:
A) Insulation and Drywall: Insulation materials are installed to improve energy efficiency and soundproofing. Drywall is then installed to cover the interior walls and ceilings.
B) Flooring, Painting, Trimwork etc.: Flooring materials such as hardwood, tiles, or carpet are installed. Bathroom tilework is put in place. Painting is done on walls, ceilings, and exterior surfaces. Trimwork, including baseboards, crown molding, and door casings, is also added.
C) Cabinetry, Fixtures, and Appliances: Cabinets, countertops, and other fixtures are installed in kitchens and bathrooms. Appliances such as stoves, refrigerators, and sinks are also put in place.
Stage 6: Punchlist and Handover

This is the final stage and involves resolving any outstanding issues that need to be addressed by the builder before the residence is turned over completely to the homeowner.
So there you have it: a brief overview of the six stages in the residential construction process, from the pre-construction stage to the final finishing touches.
I have always found the building process fascinating, and continue to learn more about construction over the last year especially, as B Squared Design is nearing the end of our first full-home new construction project in the US. Despite the obvious challenge of coordinating with the homeowner and contractor while being overseas in Hong Kong (with a few trips back and forth at critical stages), ultimately it has been a hugely rewarding process, and one that I hope to recreate many more times in the future!

Interested in working together? Schedule a Discovery Call. Let’s talk!